MinIO Service
enInstallation Guide
This documentation assumes:
- MinIO service is going to be run in Docker container
- NGINX reverse proxy is installed on the same machine as MinIO’s Docker container
The MinIO console will be run on the domain subpath /minio-console. To configure MinIO on dedicated DNS refer to MinIO’s documentation.
Docker
Create the docker-compose.yml file with the following content:
version: '3.9'
services:
  termx-minio:
    restart: unless-stopped
    image: quay.io/minio/minio
    container_name: termx-minio
    command: server /data --console-address ":9001"
    volumes:
      - ./minio-data:/data
    environment:
      - MINIO_ROOT_USER=$minio-username
      - MINIO_ROOT_PASSWORD=$minio-password
      - MINIO_CONSOLE_SUBPATH=/minio-console/
      - MINIO_BROWSER_REDIRECT_URL=http://localhost/minio-console
    ports:
      - 9100:9000
      - 9101:9001
Configure MINIO_ROOT_USER and MINIO_ROOT_PASSWORD environment variables or link environment file from the file system.
Uploaded files will be save in minio-data folder on the host machine
NGINX
server {
    ... your usual stuff here

    location /minio-console/ {
        rewrite   ^/minio-console/(.*) /$1 break;
        proxy_pass http://localhost:9101;
        proxy_set_header Host $http_host;
        proxy_set_header X-Real-IP $remote_addr;
        proxy_set_header X-Forwarded-For $proxy_add_x_forwarded_for;
        proxy_set_header X-Forwarded-Proto $scheme;
        proxy_set_header X-NginX-Proxy true;

        # This is necessary to pass the correct IP to be hashed
        real_ip_header X-Real-IP;

        proxy_connect_timeout 300;

        # To support websockets in MinIO versions released after January 2023
        proxy_http_version 1.1;
        proxy_set_header Upgrade $http_upgrade;
        proxy_set_header Connection "upgrade";

        chunked_transfer_encoding off;
    }
}
Refer to MinIO’s documentation for details regaring NGINX configuration.
Users
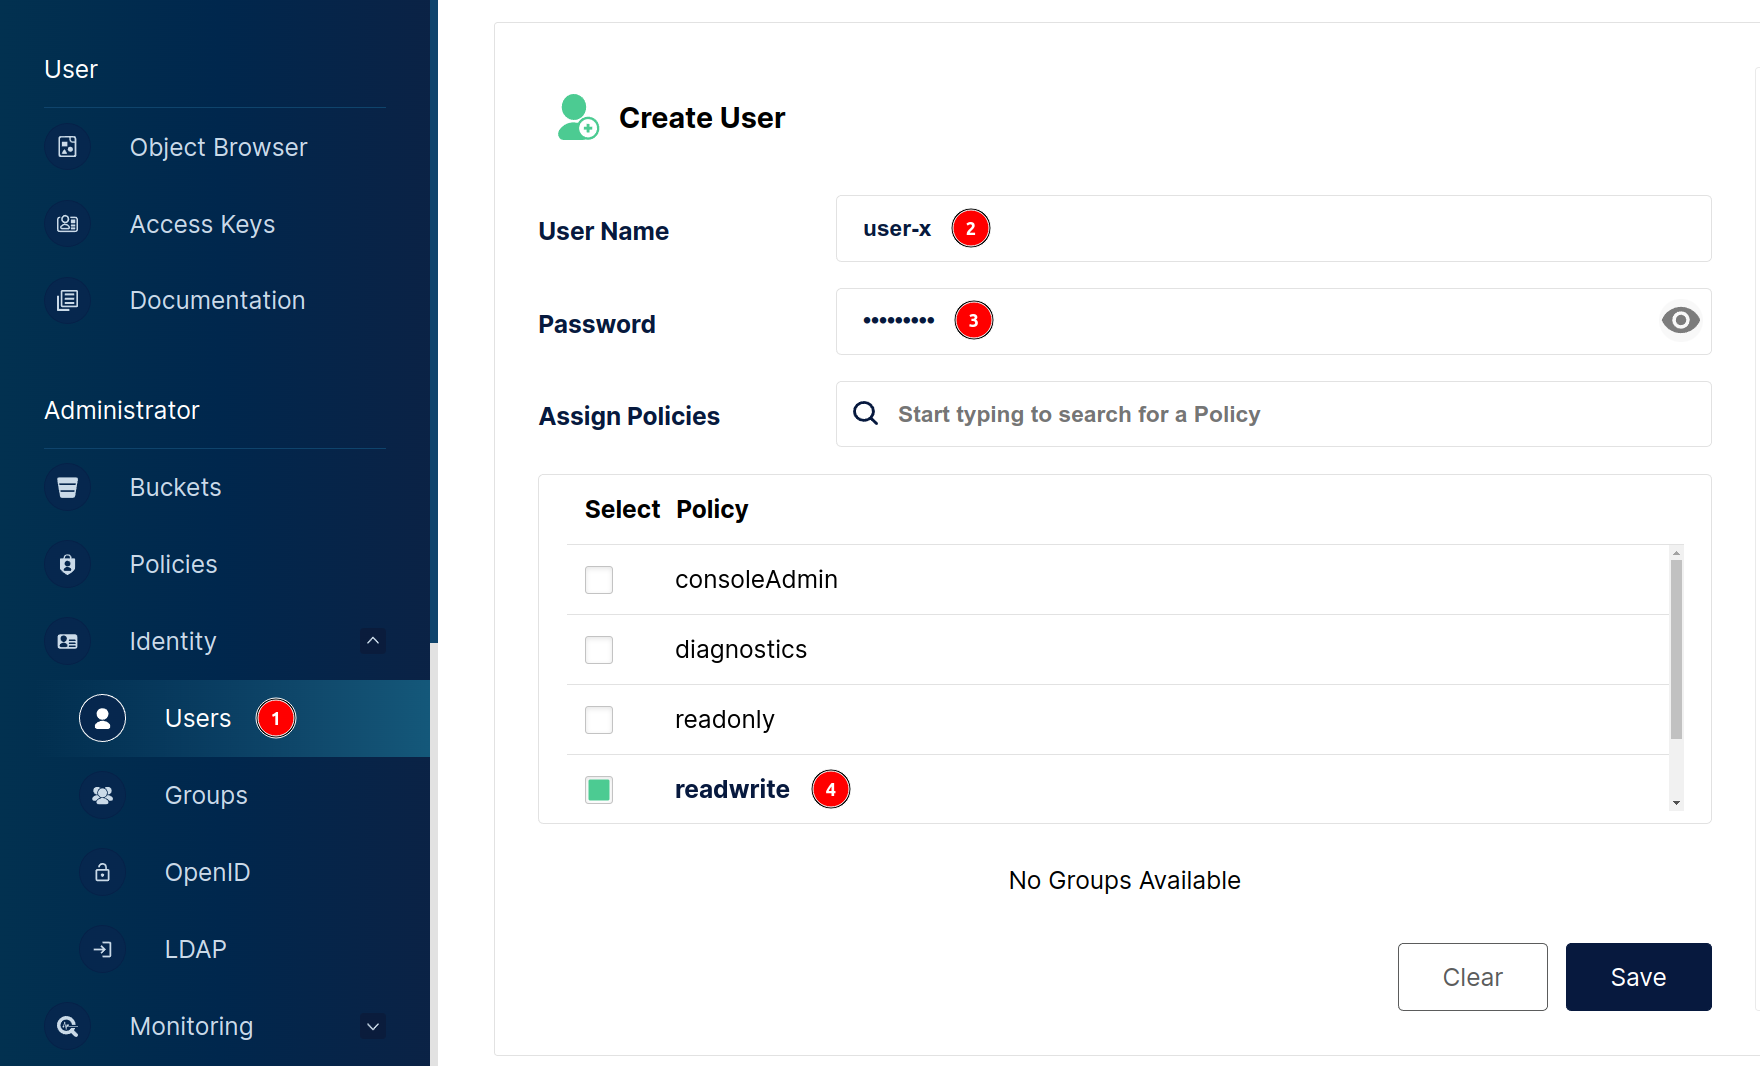
In order to start uploading files you have to add a new user. Navigate to the MinIO’s console and create a new user with readwrite policy.
The newly created user’s username and password is going to be used in termx-server configuration.
