Authentication
enOpenId Connect
TermX does not provide its own management of the users, user groups, and their relations.
TermX uses the standard OpenId Connect protocol for user authentication.
TermX is designed to be integrated with the security infrastructure of the end user or with OpenID Connect compatible authentication server (such as Keycloak).
We expect that information about the user and their groups will come from the SSO server. We expect that SSO will be configured to use the client’s LDAP or Active Directory or custom User Management solution. The application uses attribute roles from /userinfo endpoint provided by OpenID Connect provider.
GET <Keycloak realm url>/protocol/openid-connect/userinfo
Authorization: Bearer <access_token>
HTTP/1.1 200 OK
Content-Type: application/json

{
  "sub": "4417eef9-e6e8-4a29-b821-d9756b138202",
  "roles": [
    "kts-editor",
    "kts-viewer",
    "kts-admin",
    "kts-publisher"
  ],
  "preferred_username": "some_username"
}
For every role in the user info application look for TermX privilege with the same code.
Every privilege specifies access to the specific resource types or/and to the list of resources and related actions.
See TermX permissions for details.
Keycloak
Keycloak is an open-source software to allow single sign-on with Identity and Access Management. Keycloak provides user federation (such as LDAP or Active Directory), strong authentication, user management, fine-grained authorization, and more. Keycloak implements the OpenID Connect protocol and can also authenticate users with existing OpenID Connect or SAML 2.0 Identity Providers.
Below we provide an example of the Keycloak configuration with internal users and groups.
Instruction to setup Keycloak:
- Open Keycloak Admistration Console.
- Create a separate realm for every installation (for every environment) and enable OpenID configuration.
- Create and enable new clients. Set
- Client protocol -> “openid-connect”
- Access type -> “public”
- Standard Flow Enabled - “on”
- Direct Access Grants Enabled - “on”
- Valid redirect url - url where TermX deployed (for example https://termx.kodality.dev/*)
- Web origin - url where TermX deployed (for example https://termx.kodality.dev). NB! Ensure that there are no slash “/” at the end!
- Backchannel Logout Session Required - “on”
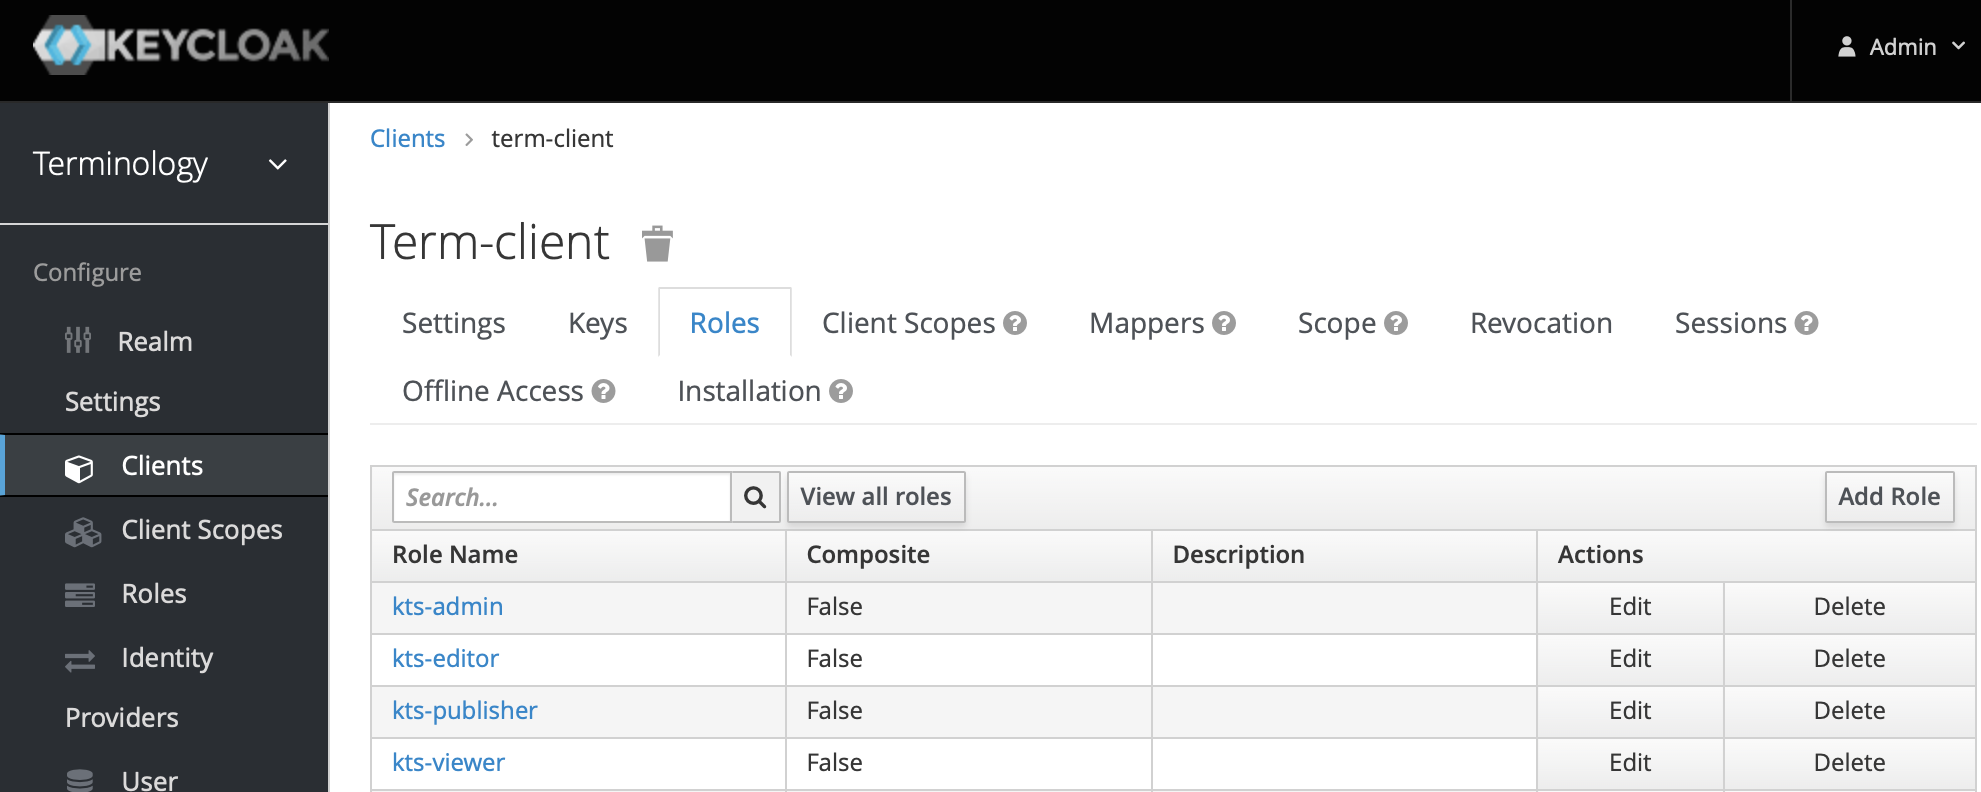
- Add roles (picture below shows default configuration)
- Client scope
- Ensure that “roles” belong to “Assigned Default Client Scopes” in the section “Default Client Scopes”.
- Ensure that “offline_access” belong to “Assigned Optional Client Scopes” in the section “Optional Client Scopes”.
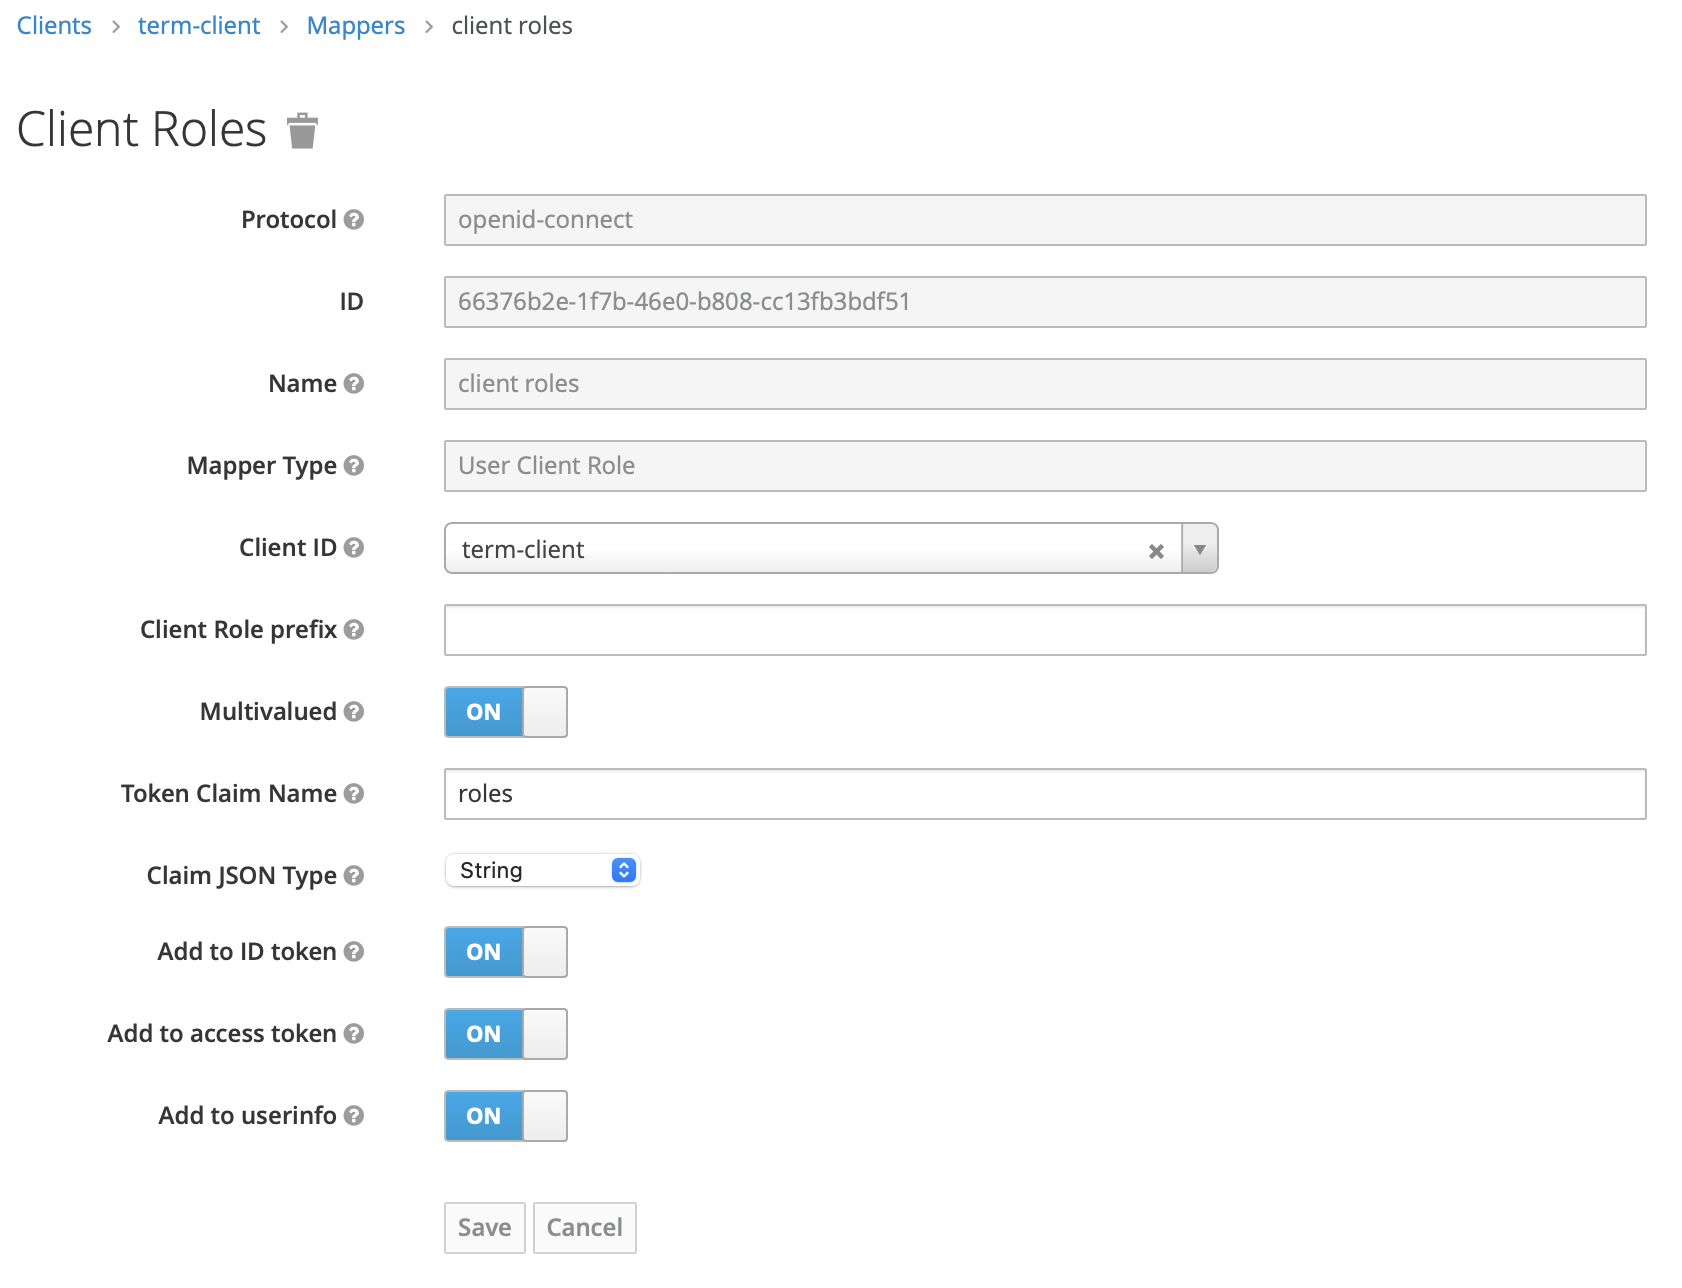
- Add Mapper for client roles according to the image below
- Multivalued - “on”
- Token claim name - “roles”
- Add to ID token - “on”
- Add to access token - “on”
- Add to userinfo - “on”
- If you manage users directly through Keycloak
- Add “offline_access” in “client scope”
- Add required “roles” in your created client
Github login
Add new identity provider with type Github. Redirect URI, Client ID and secret are provided by Github after registering new Authorized Oauth app either by personal or organization account https://github.com/settings/applications.

Admin role mapper
If you would like to automatically assing admin role to all Github users you should create a mapper under Github identity provider:

Keycloak 21
The interface looks different in the newer version of Keycloak. If you use Keycloak 21.0.1, here is how to set up a basic configuration to work with Kodality:
- Open the Keycloak administration console.
- In the left-hand dropdown menu, choose the option Create Realm.
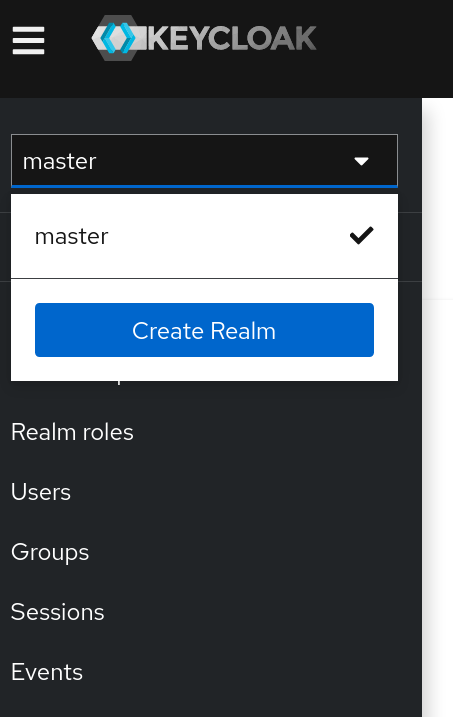
- In the resulting form it suffices to enter the Realm name for your Kodality installation, e.g. terminology. If you are migrating from a different Keycloak installation or restorign from backup, you may also choose to upload the realm .json file here and realm info will be recreated.
- Once the realm is created, make sure it is selected in the realm selection drop-down on the left side. Choose the menu option Clients. Besides the default clients already listed on the screen, a specific client for Kodality should be created by clicking the Create client button.
- Enter a Client ID of your choosing, e.g. terminology-server and click Next. The next screen displays the Capability config. Make sure that both Client authentication and Authorization is off and click Next.
- The next screen displays Login settings:
- Valid redirect URIs and Valid post logout redirect URIs should be set to the URL where Kodality is hosted, e.g. https://terminology.kodality.dev/* (note the mandatory wildcard * at the end). If testing on localhost, you may be using http:// instead of https://.
- Web origins should be set to the URL where codality is hosted with no trailing slash, e.g. https://terminology.kodality.dev
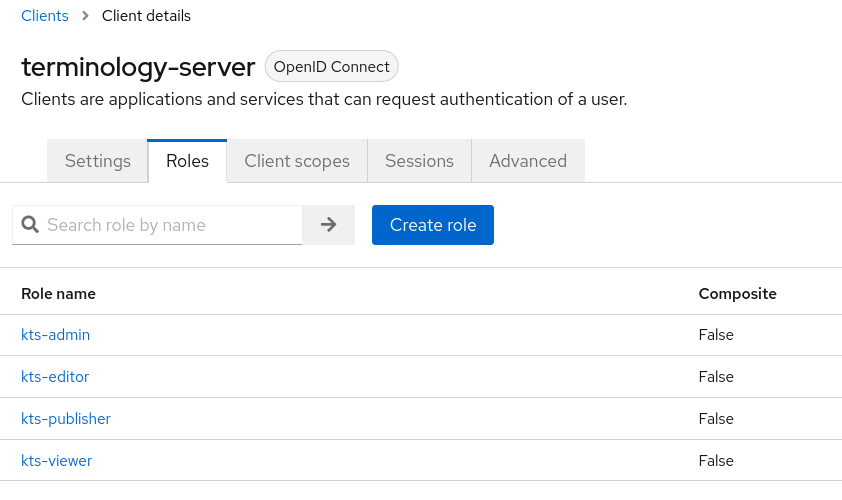
- Next you should configure the user roles that will be available to users and passed to Kodality after authentication. Frome the menu on the left, choose Clients and select the client that you have just created, e.g. terminology-server. From the tabs under the client name, select Roles. Initially there will be no roles assigned to the client. Click on the Create role button to assign four roles that are recognised by Kodality: kts-admin, kts-publisher, kts-editor, kts-viewer. After entering the Role name of each role, click Save and go back to client roles to add another role until all the roles are in the list. The roles tab should resemble the image below.
- In order for the roles to be correctly passed to codality, they must be added to the authentication token. To do this, select Client scopes from the left-hand menu. From the existing list of client scopes, choose the one named roles. Next, open the Mappers tab. It will list already existing role mappers. Click on the Add mapper button and select the option By configuration. Keycloak will then show a table with possible mappings.
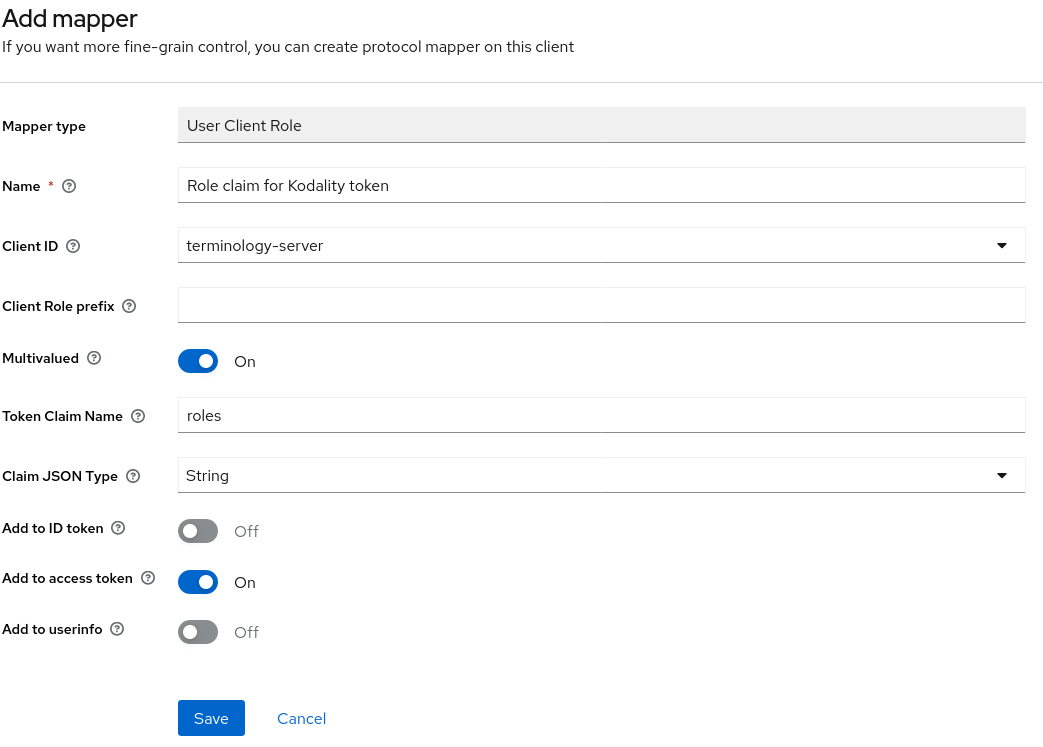
- In the table of mappings choose the User Client Role mapping and fill out the form with the following values, as shown in the image below.
- Name: any name of your choice.
- Client ID: choose your client’s name from the dropdown, e.g. terminology-server.
- Client Role prefix: should be left empty.
- Multivalued: on.
- Token Claim Name: roles (note the lower case).
- Claim JSON Type: String
- Add to access token: on.
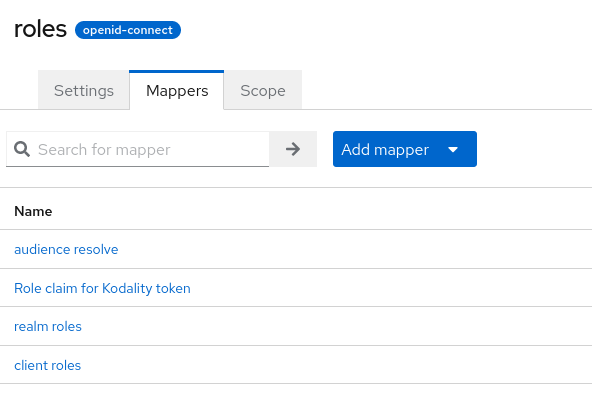
- The newly created mapper should be visible in the list of Client scope detailes for list item roles:
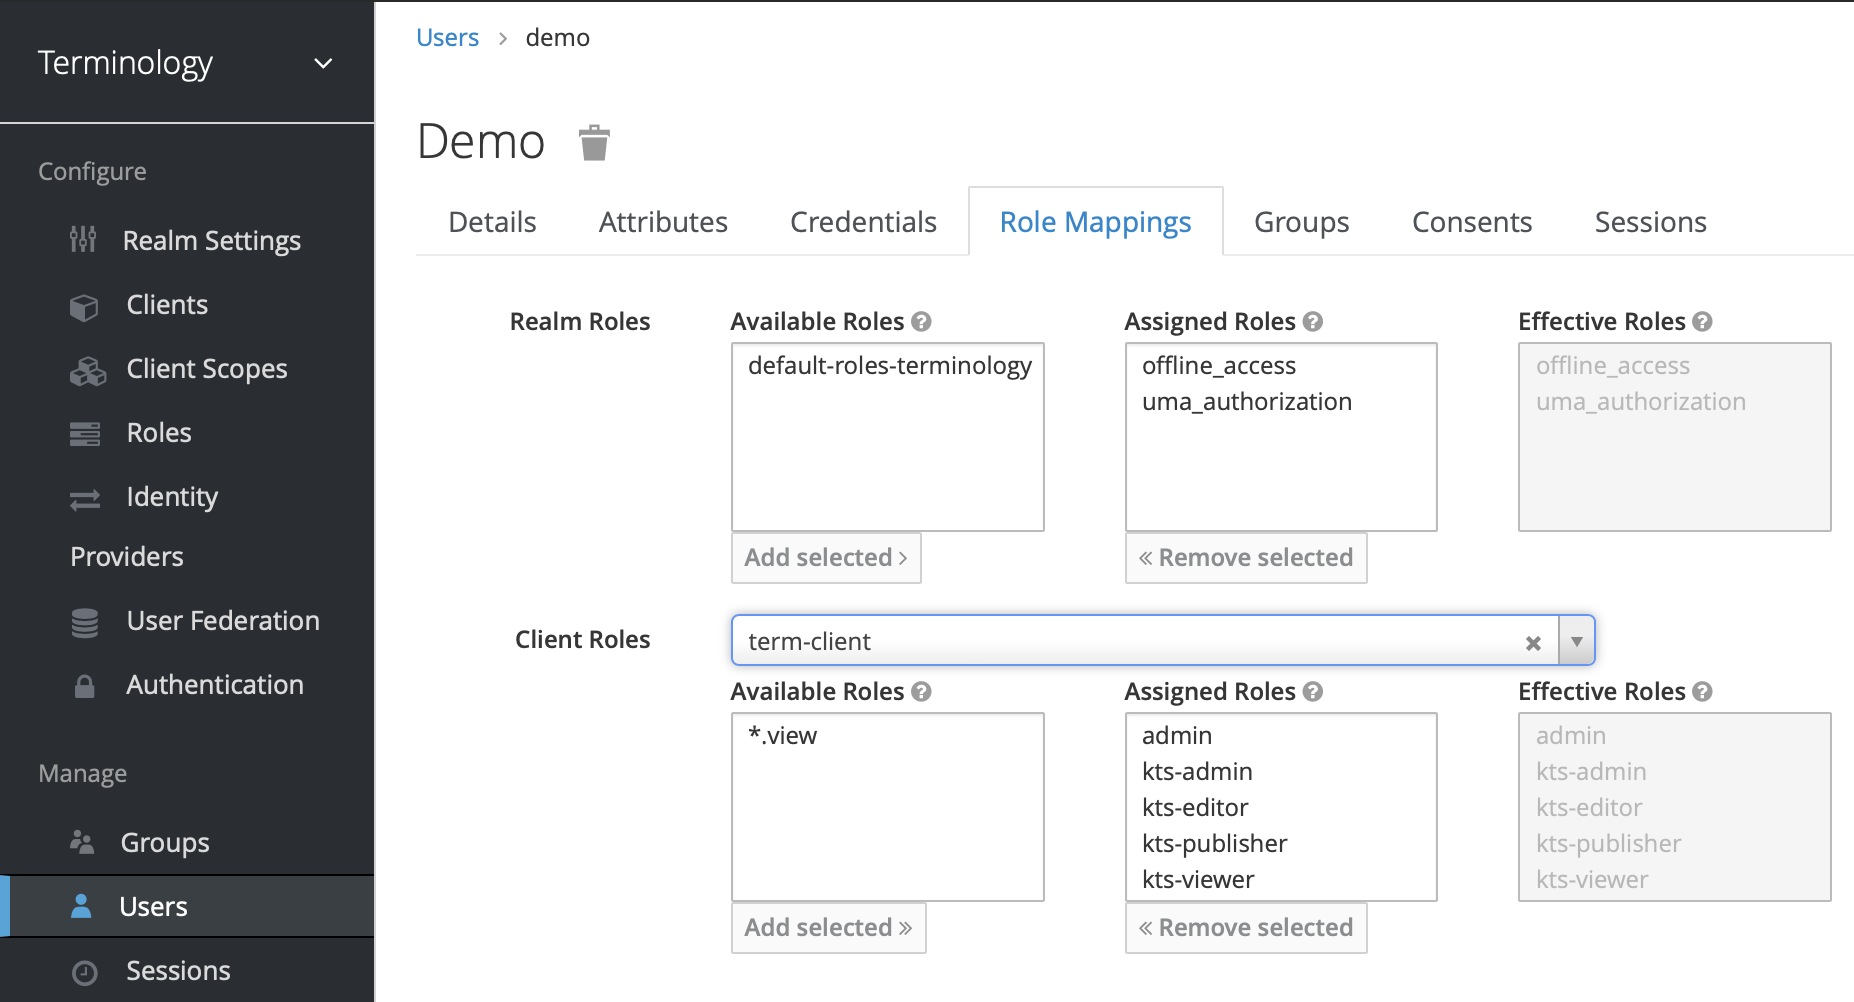
- Finally, depending on your needs and user management strategy, create one or more user groups and assign corresponding roles.
- For example, you may want to have a user group with all roles. In the left-hand menu choose Groups and click the Create group button. Enter a name that reflects the roles, e.g. terminology-superadmins.
- In the list of groups, which now should contain at least the newly created group, click on the group name. In the next screen choose the tab Role mapping under the group’s title.
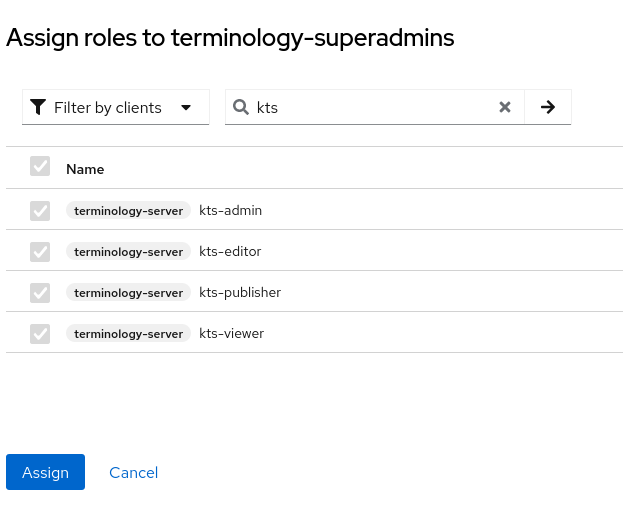
- Click on the Assign role button. In the resulting dialogue it is possible to switch between two drop-down options: Filter by realm roles and Filter by clients. Select Filter by clients.
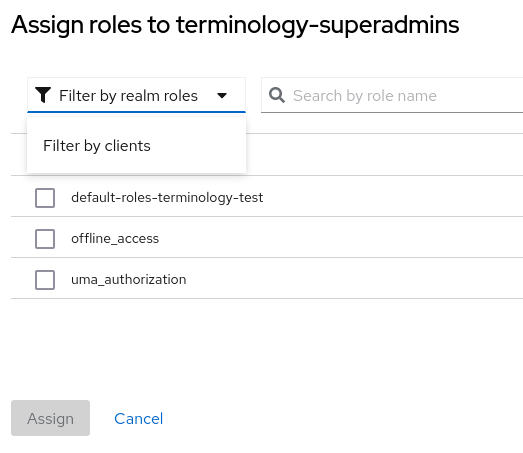
- Scroll through the resulting list until you see your client’s title and the relevant roles (kts-admin, kts-editor, kts-publisher, kts-viewer). Click checkboxes next to the roles that you would like to add to this particular group. When you are done, click the Assign button. Note that depending on your list viewing options, there might be several pages of roles that you need to search through. Or you may simply enter kts in the Search by role name field at the top of the list.
- Finally, select Users from the left-hand menu and Create new user. Enter the desired username. Click on the Join Groups button and select the group or groups that you want the user to access, e.g. terminology-superadmins from our previous example. You may also add the user to one or more groups from the Groups tab in user details.
- If you wish to assign the user with a password, choose the Credentials tab in user details and click the Set password button.
Now after entering the Kodality-web URL, the user should be redirected to the Keycloak instance for logging in. After entering a valid username and password, the user should be redirected back to the Kodality web interface and shown relevant content, e.g. code systems and value sets, top-level menu and user options.
Connecting Kodality to your Keycloak instance
Please remember that the realm name and client name must be set correctly in the terminology-web and terminology-server configurations as documented in the installation guide.
If you are deploying Kodality with Keycloak on a machine other than localhost, SSL has to be setup in order for the systems to integrate correctly. If testing on localhost only, insecure HTTP connection is acceptable. In this case it is possible to run Keycloak in developer mode (with the start-dev key).